
The term “smart contract” was coined by Nick Szabo in 1994, and they were made popular with the introduction of Ethereum in 2015, but many people don’t realize that Bitcoin also has them – in fact, the only type of transaction that Bitcoin supports is a scripted transaction!
Multi-signature wallets, Lightning Network, escrow, all rely on this feature, and so does every Bitcoin transaction ever made – it’s just that this is hidden “under the hood” of wallet software. So, let’s lift the hood with Bitcoin Script 101, and see what Bitcoin Script is all about!
Basics of Bitcoin Transactions
In Bitcoin, every transaction has a number of associated inputs and outputs. The inputs “fund” the transaction, while the outputs specify the destinations and the respective amounts. When your wallet shows you how much money you have, it’s showing you the sum of the unspent transaction outputs (UTXOs) that you have the keys for to use as inputs – the Bitcoin that you can spend.
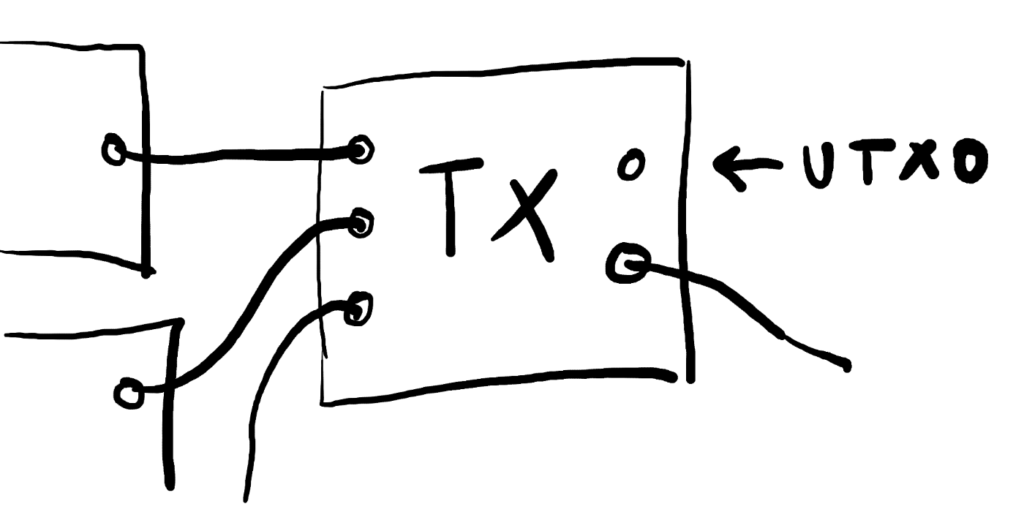
A UTXO can be spent only once, and is always spent completely – if you want to spend less Bitcoin than the UTXO is for, just create additional transaction outputs that “return” some BTC back to you (in other words, create new UTXOs that you control, for the amount that you want to receive as “change”).
With that out of the way, let’s get our hands on some UTXOs!
Setup
We will be using the Electrum wallet, because it has some features that we need (and because it’s a “light wallet”, so it will sync quickly). Get it from electrum.org, then start it from the “Electrum Testnet” shortcut:
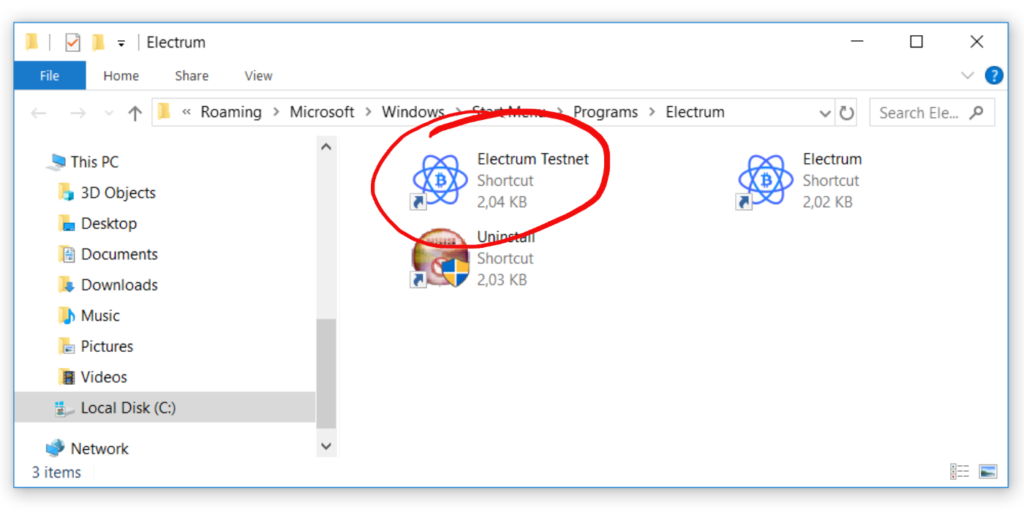
If you don’t have this shortcut, create it, by linking to the main executable and adding --testnet as a command line argument.
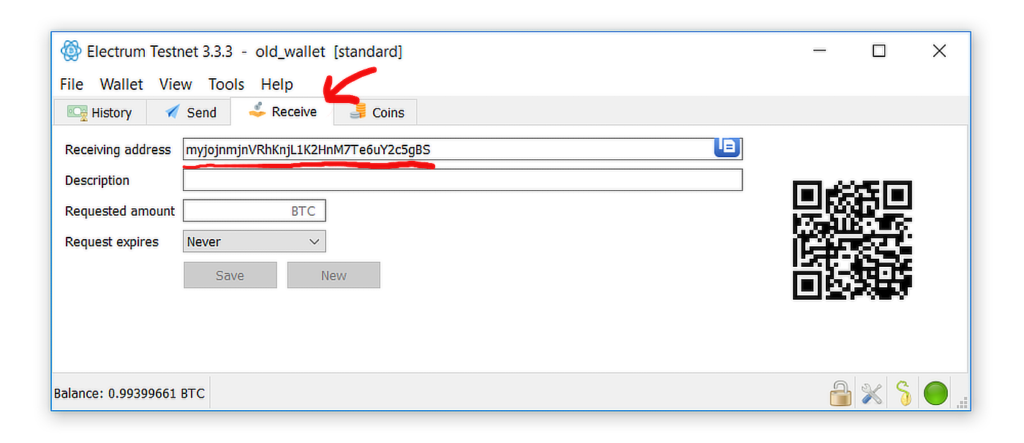
Open the wallet, get an address from the “Receive” tab:
Then search Google for “bitcoin testnet faucet” and request some tBTC (“testnet Bitcoin”). At the time of writing this article, there are active faucets here, here and here.
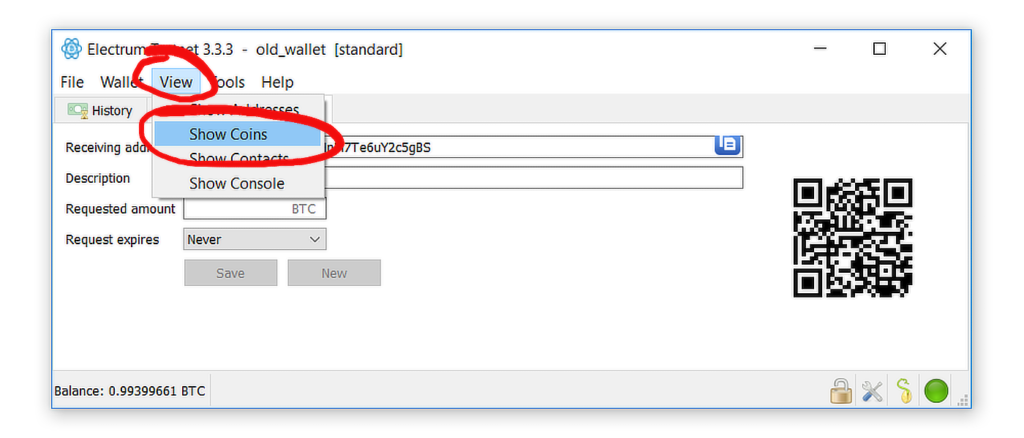
Let’s also activate the “Coins” tab by going to the “View” menu and choosing “Show Coins”. We will need this tab later, to see the UTXOs.
While we’re waiting for our tBTC to arrive, let’s set up our development environment. Install NodeJS and npm if you don’t have them already, then open a terminal and type:
$ mkdir btc_scripts
$ cd btc_scripts
$ npm init -y
$ npm install bitcore-lib
This is everything that we need for now.
The Puzzle
We will be creating a transaction that implements a cryptograhic puzzle: there will be some amount of tBTC that anybody can claim, provided they can supply a value that makes a certain script return true. We will then create a “solution transaction”, that will return the tBTC to our wallet.

What this “guardian script” checks is whether the supplied value hashes to a certain constant.
Bitcoin Script
Bitcoin Script is a stack-based programming language, similar to Forth.
If the previous sentence made perfect sense to you, feel free to skip this section 🙂
“Stack-based” means instead of defining variables that act like named memory locations, and passing them around like that to functions, we use a stack data structure: functions take their parameters from the top of the stack, and return their results at the top of the stack.
This is similar to calculators that use “RPN” (Reverse Polish Notation):
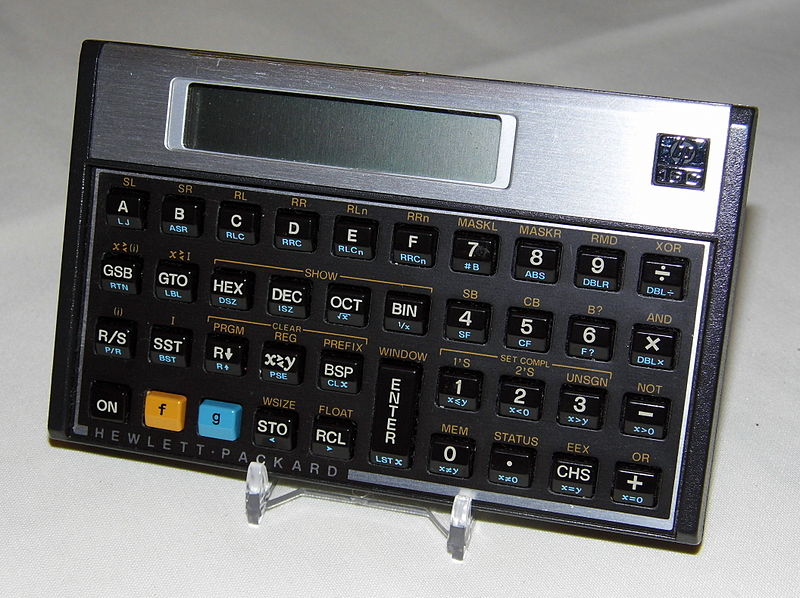
(photo by Joe Haupt, published under CC BY-SA 2.0 license)
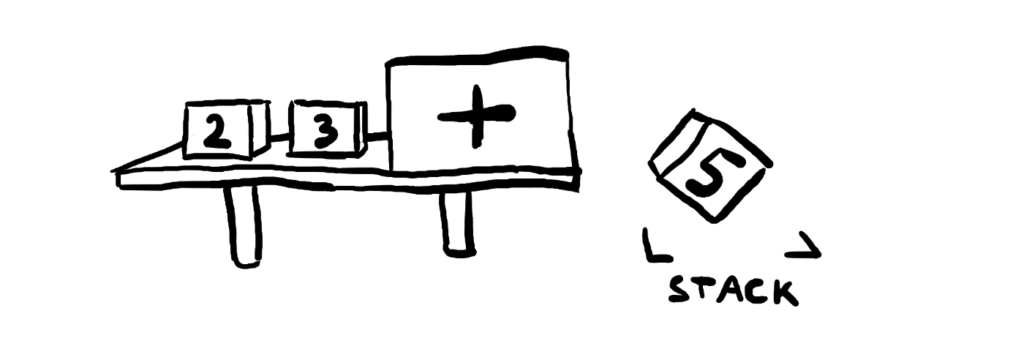
There, to calculate an expression like (2 + 3) * (6 + 1), you press 2, then press the [ENTER] key, and this pushes the value “2” onto the stack:

Then press 3 and [ENTER], and this pushes “3” onto the stack:

Then press [+], which takes the two top-most values from the stack, adds them, and pushes the result back on top of the stack:
You then continue with 6 [ENTER] 1 [ENTER] to push two more values:

Then press [+]:

Then press [*]:

…and we have our result, as the sole value left on the stack! Think how you might calculate the expression above on a “normal” calculator (say, with one storage location that you can access with [MS] and [MR]), and you’ll see why RPN calculators have their fans.
Bitcoin Script works in exactly the same way: it just supports more operations, and also has things like conditionals (IF-THEN-ELSE).
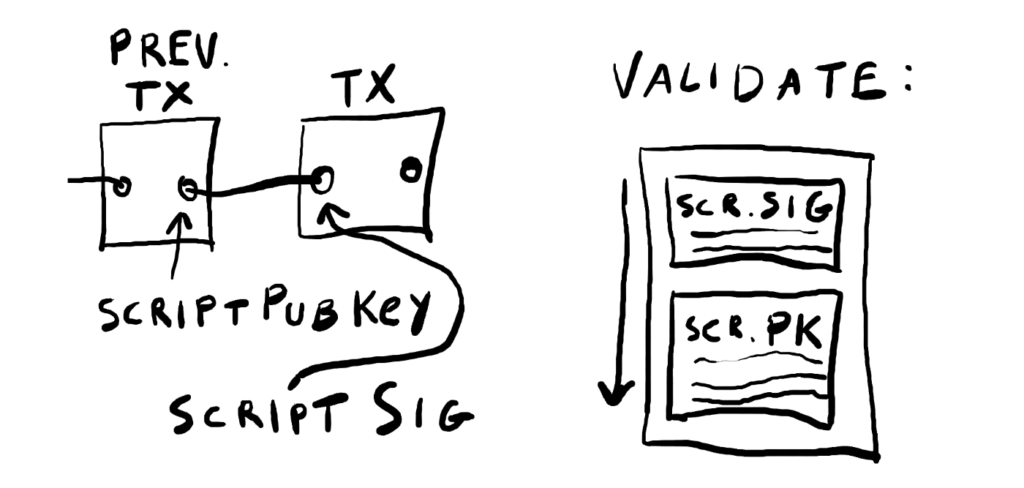
To verify whether a transaction is valid, for all inputs, Bitcoin will run the input’s attached script, and, immediately after that, it will run the script of the referenced transaction’s output. Those two halves of the script are traditionally called scriptSig (the one that supplies the values) and scriptPubKey (the one that does the check).
The makePuzzle Transaction
Let’s create a file named makePuzzle.js in our btc_scripts folder. In that file, import the library, and set the default network:
var bitcore = require("bitcore-lib");
bitcore.Networks.defaultNetwork = bitcore.Networks.testnet;
Eventually, we will need the private key for the address where we received our tBTC. In the Electrum wallet, go to the “Wallet” menu, then “Private keys”, then “Export”:
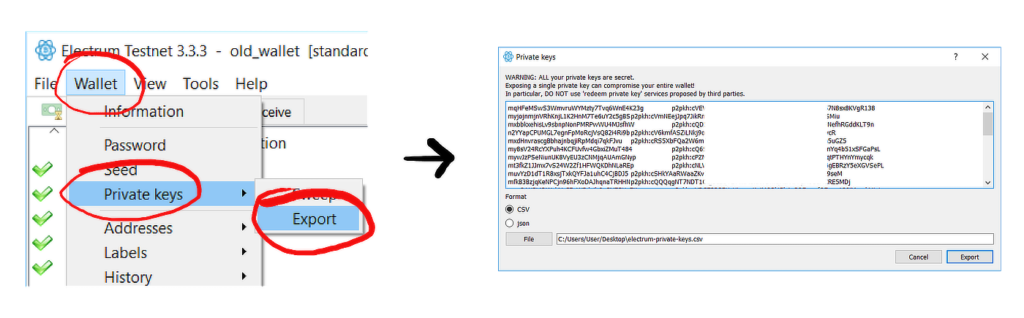
Find the private key for the address where you received your coins from the faucet, then make a variable out of it (skip the “p2pkh:” part):
var privKey = new bitcore.PrivateKey("cVEVL2oL...KVgR138");
Next we will take care of providing the input for the transaction. Go to the “Coins” tab in Electrum:

We’re interested in the “Output point” column, specifically the beginning of the transaction ID and the index (the part after the colon – in the selected line above, that’s “1”, meaning the second output of the transaction is ours).
Right-click and select “Details” to see the full transaction ID, then paste it in the search box on https://blockstream.info/testnet/. On the page that opens, click the “Details” button:

Now we have everything we need to describe our transaction input.
var utxo = {
  "txId": "d021df663441581b6cf87cc78d7607c9c85d0a44fa6115d34e55c34820d7f919",
  "outputIndex": 1,
  "address": "mzU7nJBKGysDbyCHDussmD2FFSRZ7DYu6D",
  "script": "76a914cfe10fb21c8cf85da927721efbaf8a0945083bb888ac",
  "satoshis": 89999661
}
Remember, 1 BTC is 100,000,000 Satoshis, and the hex-encoded script we just took from the “Details” section on Blockstream, called “SCRIPTPUBKEY (HEX)” there. This is the locking script of the transaction sent to us by the faucet. The unlocking script will be created automatically by the “Bitcore” library, using the private key variable we defined.
Let’s write our puzzle script. It goes like this:
var scriptPubKey = new bitcore.Script()
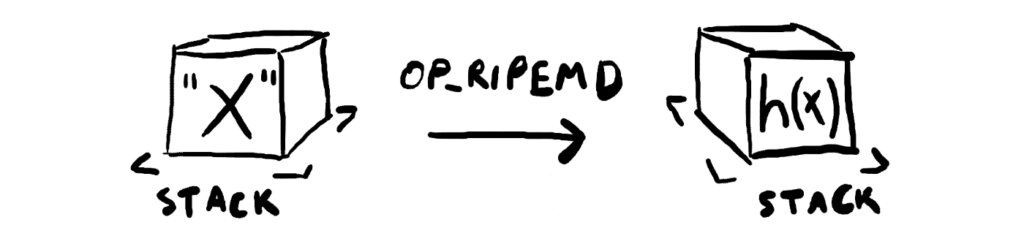
.add(bitcore.Opcode.OP_RIPEMD160)
.add(Buffer.from("3c92bdfea2bb5fd4e81cba44d3091c331d599090", "hex"))
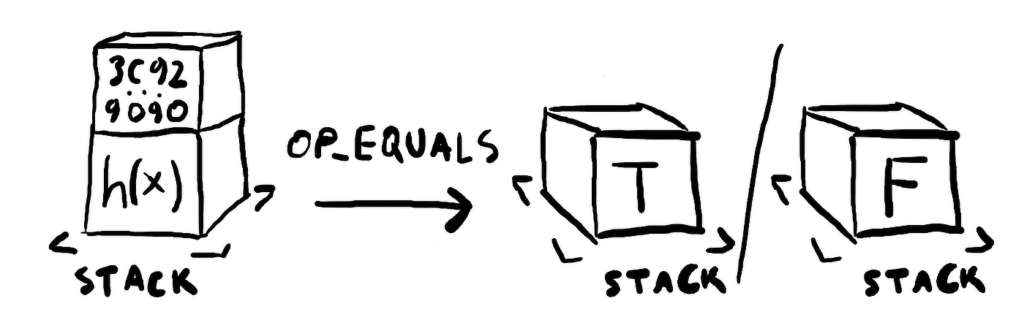
.add(bitcore.Opcode.OP_EQUAL);
Or, in plain English:
1. Take whatever is on top of the stack (presumably left there by the solution transaction), hash it with RIPEMD-160, and return the result to the stack.
2. Push the value “3c92…9090” to the stack.

3. Take the top-most two values and push either TRUE or FALSE depending on whether they’re equal (for the transaction verification machinery to find – if the value is TRUE, the transaction is valid, otherwise, it gets rejected).
The puzzle consists of finding a value that hashes to the provided constant.
Note: at the end of the scriptSig and scriptPubKey, there must be exactly one value left on the stack. If you have some temporaries left over, you must OP_DROP them.
We now use the script to construct our transaction output object:
var output = new bitcore.Transaction.Output({
  "satoshis": 85000000,
  "script": scriptPubKey
});
The “satoshis” of our output is less than the input, in this way we pay our transaction fee (the transaction fee is simply the sum of the inputs minus the sum of the outputs).
We now have all the parts needed to construct our transaction object:
var tx = new bitcore.Transaction()
  .from(utxo)
  .addOutput(output)
  .sign(privKey);
Finally, we print the transaction to the console:
console.log(tx.serialize());
Run the script, and you should see something like this:
$ node makePuzzle.js
010000000119f9d72048c3554ed31561fa440a5dc8c907768dc77cf86
c1b58413466df21d0000000006a473044022032a0396b12cb106811c0
5fa715a349fc2710c3ce43f6958eb996034181a900080220112d60619
1568a2165ba845b8329c46f7e6527902d762e9c1a583659bf96777201
21030f6eff05b2592ab5fce15bbaed10125eb24d5383d22020c7eb169
9f617eabe2bffffffff0160f590000000000017a6143c92bdfea2bb5f
d4e81cba44d3091c331d5990908700000000
We can now take the hex-encoded transaction and broadcast it, for example using this link in the footer of the Blockstream block explorer:
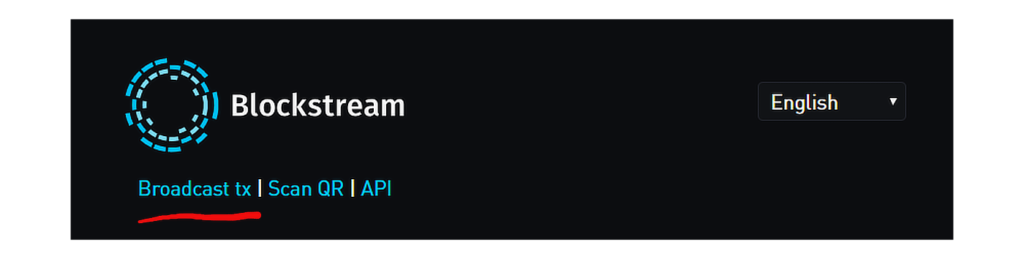
It doesn’t really matter who broadcasts it, the transaction is cryptographically-signed. If you still have your Electrum wallet open, you should see a pop-up notification about an outgoing transaction.
The solvePuzzle Transaction
Claiming the reward is easy, once you’ve guessed which value hashes to “3c92…9090” 🙂
In a file named solvePuzzle.js, we import the “Bitcore” library, and set the default network to “testnet”:
var bitcore = require("bitcore-lib");
bitcore.Networks.defaultNetwork = bitcore.Networks.testnet;
Then, from the puzzle transaction we just sent, we take the details needed to reference it as an input:
var utxo = {
  "txId": "0c93a86f3f8480a85fd757aa896ce7cd74b8671d9b51fc37ecd38e598893e819",
  "outputIndex": 0,
  "script": "a6143c92bdfea2bb5fd4e81cba44d3091c331d59909087",
  "satoshis": 85000000
};
We provide the solution to the puzzle, by pushing the secret value onto the stack:
var scriptSig = new bitcore.Script()
  .add(Buffer.from("kingsland"));
Compose the input:
var input = new bitcore.Transaction.Input({
  "prevTxId": utxo["txId"],
  "outputIndex": utxo["outputIndex"],
  "output": utxo,
  "script": scriptSig
});
Build the transaction:
var tx = new bitcore.Transaction()
  .addInput(input)
  .to("mqHFeMSwS3WmvruWYMzty7Tvq6WnE4K23g", 80000000);
The to() method will add the appropriate output script. Finally, print the transaction to the console:
console.log(tx.uncheckedSerialize());
Note: we use uncheckedSerialize() because the transaction we’re currently making is not signed, and the normal serialize() method would throw an error because of that. This error, it actually makes a good point: for example, some miner could see the solution, and just create a transaction that pays out to them, instead of you.
Once you run the script, take the encoded transaction and broadcast it – if you still have Electrum open, you should see a pop-up about an incoming transaction.
Conclusion
This concludes our “round-trip”, where we used custom scripts to send and claim some funds. But this is not the end, this is just the beginning – Bitcoin Script supports tens of instructions, which you can use to build an almost endless number of programs! For example, if you want to see a really interesting application of scripted transactions, check out Lightning Network.